Friday, August 29, 2008

Slow-Cooked Chicken and Stuffing


Ingredients
  1. 2 1/2 cups chicken broth
  2. 1 cup butter, cubed
  3. 1/2 cup chopped onion
  4. 1/2 cup chopped celery
  5. 1 (4 ounce) can mushroom stems and pieces, drained
  6. 1/4 cup dried parsley flakes
  7. 1 1/2 teaspoons rubbed sage
  8. 1 teaspoon poultry seasoning
  9. 1 teaspoon salt
  10. 1/2 teaspoon pepper
  11. 12 cups day-old bread cubes (1/2-inch pieces)
  12. 2 eggs
  13. 1 (10.75 ounce) can condensed cream of chicken soup, undiluted
  14. 5 cups cubed cooked chicken
Directions

  1. In a large saucepan, combine the first 10 ingredients. Simmer for 10 minutes; remove from the heat. Place bread cubes in a large bowl. Combine eggs and soup; stir into broth mixture until smooth. Pour over bread and toss well.

  2. In a 5-qt. slow cooker, layer half of the stuffing and chicken; repeat layers. Cover and cook on low for 4-1/2 to 5 hours or until a meat thermometer inserted into the stuffing reads 160 degrees F.

Yield: 14 servings


Recipe Provided By: Taste of Home

Tuesday, June 24, 2008

Roasting Tips


Always place a rack in the bottom of the roasting pan, so the meat or poultry doesn't sit in its own fat drippings. And be sure to roast at a low temperature, about 350 F, to avoid searing the meat or poultry and sealing in the fat.

For basting, use fat-free liquids such as wine, tomato juice or lemon juice.

Tip by: Gourmet Recipes


Sunday, June 22, 2008

Chinese Chicken Wings


Prep: 15 min, Cook: 1:00.
  • 3 lbs. chicken wings
  • 1 cup soy sauce
  • 1/2 cup sherry
  • 1/2 cup firmly packed brown sugar
  • 2 Tbs. finely chopped fresh ginger
  • 2 tsp. lime zest

Heat oven to 400°F. Cut off wing tips; discard. Cut each wing at its joint into 2 pieces. Rinse wings well and dry with paper towels. Arrange wings in a large roasting pan. Combine remaining ingredients in a small bowl; stir until sugar dissolves. Pour over wings. Roast for 30 minutes. Turn wings and continue roasting for 20 more minutes. Carefully pour off drippings in pan. Bake 10 more minutes until wings reach a deep brown color. Serve hot. Makes about 4 wings per serving.

This recipe serves 6 people. Due to the nature of this recipe, it adjusts the number of servings in multiples of 6 only.

by Jan Turner Hazard

Thursday, June 5, 2008

How to Buy Lobster Tails & Not Get Ripped Off

Clawed or Unclawed?

buying lobster tailsMost of us think of live Maine lobsters with those two large, meaty claws when we think of lobsters. You buy them live in many supermarkets today or have them sent to you via the Internet. If a Maine lobster is missing a claw, it is called a "cull".

Spiny lobsters, also called Rock Lobster, have no claws but hard shells and very long antennae. They come from both warm and cold water climates and are the most the source for frozen lobster tails. There are more than 40 species of clawless lobsters found around the world. They can grow as large as 15 pounds but most range from 1 to 5 pounds.

When I asked Chef Lee Lippert why they don't sell the tails from Maine lobsters, he told me they are just too expensive. The Maine lobster outgrows their tail meat after they reach one pound so the bigger the lobster, the less tail meat. In a one pound lobster, there is about 6 ounces of meat in a Maine Lobster tail but 7 1/2 ounces in a New Zealand clawless tail.

Warm Water or Cold?

When it comes to lobster tails, the first and most likely the most important decision you will make is whether to buy warm water or cold water tails. Warm water tails come mainly from Florida, the Caribbean and Latin America with big suppliers from Cuba and Nicaragua. Cold water tails generally come from Maine, Australia, New Zealand and South Africa.

According to Chef Lee, 1 out of 5 warm water tails that he handled while in the restaurant business were bad. What does he mean by bad?

  • The tail stays mushy after being cooked.
  • It doesn't firm up.
  • The tail firms up but falls apart easily.
  • It has an ammonia odor.

What was his experience with cold water lobster tails?

Over his 25 year experience and having cooked more than 10,000 lobsters, he figures he only had 5 bad ones. That's some difference. It tells me if you want to avoid a disappointment when making a special diner, you want to buy cold water tails.

Yes, you will pay more for cold water tails. Lee figures it's about a $5.00 difference per pound but I think of it as buying an insurance policy. It will end up costing a lot more if you end up throwing one of the tails away besides ruining a beautiful dinner.

How can you tell the difference between warm water and cold water tails?

  • Ask before you buy. You want to know specifically if they are from water water or cold and where they were caught. If you fish provider doesn't know, stay away.
  • Check their shells. Caribbean warm water tails have distinct yellow spots and a yellow band across the tail. Australian tails don't have these markings.

Quality and Taste Differences

There is a definite difference in taste and quality between warm and cold water tails. The cold water tails have whiter meat and are considered more tender because they grow more slowly in colder water. Most people will tell you the more expensive cold water tails also have a cleaner taste.

How to buy frozen lobster tails.

  • Buy from a reputable source like Lobster Gram
  • If you see lobster tails at some unbelievable price, they most likely are warm water tails or you will pay for what you get.
  • If they are not marked warm water or cold water and no place of origin given, assume they are warm water tails.
  • If you see discoloration in the flesh, especially black spots, figure they were not handled properly.
  • If the tail has a grayish color, it is a sign the lobster wasn't alive during processing.
  • Any signs of yellowing or dull meat should be avoided.
  • Ask your fish purveyor if the tails have been soaked in sodium tripoyphosphate prior to freezing. If it has, don't buy them.
  • Look out for "glazing". This is when water is injected between the meat and the shell before freezing. It adds up to 20% additional weight to the tail so you pay more for less. Typically only done to warm water tails to protect during storage.
  • The best time of year to buy lobsters is during the winter when prices tend to be lower.
Article by: Reluctant Gourmet

Wednesday, June 4, 2008

Apple Puff Pancake


(serves 2)

2 Tbs butter
2 eggs
1/2 cup milk
1/2 cup flour
pinch of salt
2 Tbs brown sugar
1/4 tsp cinnamon
1 apple, peeled, cored, and thinly sliced

Preheat the oven to 400.

Melt the butter in a pie pan in the oven as it's heating and swirl it around to coat the edges.

Mix together the eggs, milk, flour, and salt.

Sprinkle brown sugar and cinnamon over the melted butter. Lay the apple slices down in the butter. Pour the batter over the apple and bake for 30-35 minutes.

Take it out and turn it over onto a serving plate. Cut in slices and serve. Sprinke with powdered sugar, if desired.

Recipe by: Cheap Cooking


Tuesday, June 3, 2008

Crockpot Beef Roast


Ingredients:

* 2 pound beef roast
* 1 can cream of mushroom soup
* 6 carrots (sliced)
* 6 potatoes (cubed into small pieces)
* 1 onion (diced)
* Water


Methods:

Place onion, carrots and potatoes at bottom of crock pot.

Dredge roast in flour and placed in lightly greased pan. Brown on both sides in hot oil over high heat.

Place roast in crock pot over vegetables. Pour soup and 1/2 can water over roast.

Cover and cook on low for approximately 10 hours, or 5 to 6 hours on high.

Recipe by : FreeQuickRecipes.com

Monday, June 2, 2008

You Can Write Your Own Cookbook


Did you know you can write your own cookbook? Even if you can't cook! You can create your own cookbook from some of your mother or grandmother's favorite recipes. Even if you absolutely hate to cook, if you write your own cookbook someone in the family will find a hidden recipe from their past that they have been searching for.

You can neatly type all the recipes or hand write them if formality is not important to you. The main thing is to get started. Getting organized is always the tough part. Once you've put together a few recipes the ideas will begin to jump out of your head!

First organize a few of your favorite dishes, whether it be desserts, main course entrees or simply a group of your favorite sandwiches. As you write your own cookbook you will want to categorize each section. You may find that you have enough ideas to write one complete book on sandwiches and another on desserts, etc., etc.

If you really start to get into the project, put your computer and digital camera to work. Use the same font as you type each recipe and include pictures of the finished meal. Or, if your instructions are a bit complicated, you can include photographs of each step along the way.

Once you have the project completed, simply store the pages in a neat three ring binder with those clear plastic protective sleeves.

So now you know you can write your own cookbook. Maybe you've just found a profitable niche. Cookbooks of all types are always on the top seller lists. I'll be looking for yours!

Turn your passion for cooking into some real cash! Learn how to write and sell your own cookbooks at Create Your Own Cookbook That Sells. Those dusty recipes in your file box may just make you rich!

By Steve Kettle

Friday, May 30, 2008

Quick Cooling Method For Bar Desserts And Brownies


A sure fire easy way to remove bars from a hot pan for a quicker cooling time:

1. Spritz bottom of pan with nonstick cooking spray.

2. Measure out enough wax paper to line the pan PLUS hang out over two sides.

3. Spray the wax paper and exposed pan sides with nonstick cooking spray.

You’re ready to fill the pan with batter.

To remove hot bars or brownies, simply and CAREFULLY grab the extra wax paper.

Pull straight up and move directly to a cooling rack. Allow to cool completely before cutting.

Article by: Jill


Tuesday, May 27, 2008

Egg Foo Yung


Ingredients:

1/2 cup reduced-sodium chicken broth
1 1/2 Tbsp oyster sauce
1 Tbsp ketchup
1 tsp soy sauce
1 tsp distilled white vinegar
1 tsp cornstarch
1 bunch scallions
8 large eggs
1 tsp Asian sesame oil
1/4 lb sliced fresh mushrooms (preferably shiitake)
1 cup fresh bean sprouts (3 oz)
2 Tbsp vegetable oil
6 oz peeled cooked shrimp, chopped


Method:

Whisk together broth, oyster sauce, ketchup, soy sauce, vinegar, cornstarch, and a pinch of salt in a small heavy saucepan. Bring to a simmer, whisking occasionally, and simmer 2 minutes. Remove from heat.

Chop scallions, separating white parts and greens.

Beat eggs in a bowl with sesame oil and 1/4 tsp each of salt and pepper.

Cook white scallion, mushrooms, sprouts, and 1/4 tsp salt in vegetable oil in a 10-inch nonstick skillet over medium-high heat until any liquid has evaporated, about 5 minutes. Add shrimp and half of scallion greens, then pour in eggs and cook, stirring occasionally, until eggs are just cooked but still slightly loose. Cover skillet and cook until eggs are just set, about 3 minutes.

Serve sprinkled with remaining scallion greens. Serve sauce on the side.

Recipe by: Ian Knauer
Photo by: by Romulo Yanes

Friday, May 23, 2008

Oh-So-Delicious Oatmeal


Prep time: about 10 minutes

Ingredients:

  • 1 c. water
  • 1/2 c. rolled oats
  • dash of salt
  • 1/4 c. applesauce
  • pinch of cinnamon
  • 2 tsp. brown sugar

Utensils:

  • cooking pot
  • measuring cups and spoons
  • stove (You'll need help from your adult assistant.)
  • mixing spoon
  • serving bowl

Directions:

  1. Pour the water, oats, and salt into a medium-size pot on the stovetop.
  2. Heat the mixture until it boils, then turn the heat to low.
  3. Using a wooden spoon, stir in the applesauce and cinnamon.
  4. Cook on low heat and continue to stir the mixture for 5 minutes.
  5. Pour the oatmeal into a bowl and sprinkle the brown sugar on top.
  6. Allow the oatmeal to cool for a minute before digging in.

Serves: 1


Recipe by: Kids Health


Thursday, May 22, 2008

chopped veggie salad with watermelon and feta cheese


This type of chopped salad was once common breakfast fare in Israel.

Total: 15 minutes

Servings: Makes 4 servings


Ingredients:

1 pound Campari or plum tomatoes, diced, drained
1 1/2 cups diced seeded watermelon
1 large green bell pepper, seeded, cut into 1/3-inch cubes
1/2 large English hothouse cucumber, seeded, cut into 1/3-inch cubes
1/2 cup very thinly sliced radishes
3 tablespoons olive oil, divided
10 ounces feta cheese, broken into small cubes (about 2 1/2 cups), divided
2 green onions, chopped, divided
1/4 cup thinly sliced fresh mint leaves, divided
1/2 cup plain Greek-style yogurt*
1 teaspoon dried oregano

Preparation:

Toss first 5 ingredients and 2 tablespoons oil in large bowl. Add half each of cheese, green onions, and mint. Mix remaining cheese, green onions, mint, and oil in processor; add yogurt and oregano. Process just to blend (do not over-mix or dressing will get thin). Season dressing with salt and pepper; mix into salad.

*A thick yogurt; sold at some supermarkets and at specialty foods stores (such as Trader Joe's and Whole Foods Markets) and Greek markets. If unavailable, place regular yogurt in cheesecloth-lined strainer set over large bowl. Cover and chill overnight to drain.

Ingredient tip: Campari tomatoes are about the size and shape of golf balls. They're sold on the vine, and they're available at many supermarkets.


by Rozanne Gold

Monday, May 19, 2008

Crock Pot Recipe: Broccoli Rice and Chicken


INGREDIENTS:

  • 2 pounds chicken tenders or boneless chicken breasts cut in strips
  • 1 1/4 cups uncooked converted rice
  • 1 package Knorr's Cream of Broccoli Soup Mix
  • 1 1/2 cups chicken broth
  • pepper, to taste

PREPARATION:

Place rice in a lightly greased slow cooker/Crock Pot.

Sprinkle with parsley and pepper.

Top with chicken pieces.

Mix together the soup mix and broth.

Pour over chicken and rice.

Cover and cook on low for 6 to 8 hours.

From Diana Rattray

Sunday, May 18, 2008

Antic ancho chili - mexican

Yield: 6 Servings

Ingredients:
  • 3 Dried ancho chilies
  • 1 tb Unsalted butter
  • 1 tb Olive oil
  • 2 1/2 lb Stew meat
  • 1 Large onion chopped
  • 2 tb Minced garlic
  • 1 tb Tomato paste
  • 1/4 ts Oregano
  • 1 ts Cumin
  • 1/2 ts Salt
  • 1/4 ts Black pepper
  • 1 1/4 c Beef stock
  • 1/2 c Dry white wine
  • 1 1/2 ts Chopped cilantro
  • 4 oz Goat cheese

Instructions:

Crumbled Remove stems from chilies and slit leagthwise.

Scrape out seeds.

Place in saucepan add water and heat to boiling reduce heat.

Simmer until tender about 15 minutes.

Set aside.

Heat butter with olive oil in a large heavy pot over medium heat.

Saute beef cubes a few at a time until well browned.

Set aside.

Add onions to pot cook 1 minute.

Add garlic cook 2 minutes on high then reduce heat and cook for 4 minutes.

Drain chilies reserving 1/2 cup liquid.

Blend peppers with reserved liquid.

Add to onions.

Return meat and add the other ingredients.

Heat to boliling then reduce heat and cook covered under low heat for 1 1/2 to 2 hours.

Note if the chili is to thin just remove the cover and let it render until it is thick.

Serve with rice or beans cover with goat cheese.

Recipe by: Elook

Friday, May 16, 2008

Freezing Cookies And Dough

If you're looking ahead to the holiday season and wondering how you're going to get all your baking done, consider freezing your cookie dough or fresh baked cookies ahead of time.

When the holidays get closer you can get that last bit of shopping done or last present made instead of spending all your time in the kitchen.

FREEZING COOKIE DOUGH

Cookie dough will freeze well for 4 to 6 weeks. Rolls of dough should be sealed tightly in plastic wrap (chill in refrigerator first before freezing). Other kinds of dough should be stored in airtight containers. Drop cookies (unbaked) may be frozen on cookie sheets and transferred to freezer bags. Let stand at room temperature for about 30 minutes before baking.

Don't try to freeze soft meringue-type cookie dough. Chocolate chip, brownies, peanut butter, and sugar cookie dough (or anything similar) freezes well. Let the dough defrost in the refrigerator (about 2-3 hours). Make sure to label the container with the date and type of cookie dough.

FREEZING BAKED COOKIES

Almost any baked cookie freezes well. Let cookies completely cool before freezing. Wrap cookies individually in plastic wrap then store them in a ziploc freezer bag or storage tin (coffee cans or holiday tins work great). You can also just layer the cookies between layers of waxed paper in the container, but the individually wrapped ones will store longer.

Freeze frosted cookies uncovered first until they are firm. Then pack them in airtight container lined with plastic wrap or foil. Make sure to label the container with the date and type of cookies. Unfrosted cookies can be frozen up to 6-12 months (frosted, about 3 months). Frozen cookies thaw in about 10 minutes at room temperature (if you can wait that long). If cookies should be crisp when thawed, remove them from the container before thawing.

by Rachel Paxton

Wednesday, May 14, 2008

Chicken Marsala


Ingredients:
4 boneless chicken breasts
1/4 cup all-purpose flour
1/2 teaspoon salt
1/4 tablespoon ground black pepper
1/2 teaspoon dried oregano
2 tablespoons olive oil
2 tablespoons butter
1 cup sliced fresh mushrooms
2/3 cup (sweet) Marsala wine
1/4 cup white cooking sherry
Method:
  1. With kitchen mallet, pound chicken breasts until flat and thin. Set aside.
  2. In a shallow dish mix together flour, salt, pepper and oregano. Dredge chicken in flour mixture.
  3. Heat oil and butter in a large skillet until hot; cook chicken in batches until golden browned on each side, about 2 minutes per side. Transfer to serving platter and keep warm.
  4. Add mushrooms to same skillet and cook for 2 minutes, stirring. Add wine and sherry, stirring up browned bits, and reduce volume by half. Pour sauce of chicken cutlets and serve.

Makes 4 servings.


Recipe by : Cooks Recipes

Tuesday, May 13, 2008

Brownies


Ingredients:


1/3 cup unsweetened cocoa powder
1/2 cup all-purpose flour

1/4 tsp salt
1 cup brown sugar, packed
1/2 cup baby food prunes
3 tbsp butter, melted
2 egg whites
1 tsp vanilla
1/4 cup chopped walnuts

Method:

Combine sugar, flour, lemon rind and cinnamon.

Stir in apples, strawberries and lemon juice.

Preheat oven to 325 degrees. In small bowl, combine cocoa, flour and salt. Set aside.

Blend together brown sugar, prunes, butter, egg whites and vanilla using a wooden spoon or an electric mixer on low speed.

Gradually add flour and blend after each addition. Stir in walnuts. Spread batter evenly in an 8 x 8"-inch baking pan coated with non-stick spray.

Bake 20 to 22 minutes, until edges feel dry to touch but centre appears fudgy.

Recipe by : Gourmet Recipes


Monday, May 12, 2008

Cooking For Kids- Healthy Eating For Kids

We all know that some kids are very picky when it comes to eating. Many of them feel that healthy food is just not for them. Know any kids like that? I did not think so. Here are some great tips and ideas that will get your kids excited about what they are eating.

Being Creative
Kids love to be creative. They also like to be involved. Letting them help plan and yes even help prepare the meals will get them excited about the food they are eating. Kids love choices, and if they feel they get a choice, they are more likely to eat or try new things.

Kids Friendly Recipes
There are many great kid friendly recipes as well as creative ways to prepare healthy and delicious foods. Kids love food that is interesting to them. Most kids love pizza right? Many will even eat it with a few vegetables mixed in. Make individual pizza using refrigerator biscuits or English muffins.

Find food that they can help create and assemble. They will love foods they can personalize and make it their own way, even if it is a simple bowl of tomato soup. Have different bowls of crackers, cheeses or pepperoni they can throw in their bowl.

Choose recipes that are appealing. Most kids love French fries right? Why not fix up some healthy sweet potato fries or chicken strips using wheat germ as the crust with a healthy dipping sauce.

Shapes of Food
Another great idea is making shapes out of your food. The possibilities are endless.

Using a cookie cutter or using your own art skills cut a shape out of their peanut butter and jelly sandwiches or chicken nuggets or virtually anything that can be shaped. Pancakes also make great shapes.

Animal and Bug Shapes
There are a lot of different ways to take fruit and even vegetables and make them into bug or animal shapes. For example, use an apple slice to make a lady bug. Use peanut butter as the glue and put raisins on the dots to make the spots. Ants on a log are another fun idea. Take celery and fill it will peanut butter and dot the inside with raisins. With a little creativity, your kids are more likely to eat their fruits and vegetables.

Disguises for food
A little bit of food coloring makes a perfect disguise. Add a drop or two to mashed potatoes and throw in small bits of broccoli and they would not even know they are eating vegetables. Again, kids love foods that are interesting to them.

Other easy and tasty dishes would be lasagna or spaghetti with shredded carrots or finely chopped broccoli.

Drinks
Every kid loves something they can sip on. A great way for them to get extra calcium and fruit is to make smoothies or milkshakes. Let them choose the fruits that sound good to them. You can also add small amounts of fresh vegetables to the drink without clouding the fruity taste. They might not ever notice that you have added something to their drink!

Many processed fruit drinks have a lot of added sugar. Find juices that are 100% fruit or vegetable juice. For a tasty frozen treat, you could make homemade freezer pops using the smoothie mix or fruit juices.

Conclusion
Yes, it does require a little creativity and maybe even a little disguise, but helping your children eat healthy is worth the effort.

By: Kelvin Ho


Sunday, May 11, 2008

5 Frugal Breakfast Ideas


It is the first meal we eat when we get up in the morning. After a long night of sleep, we can’t do without it if we want to get our bodies going. No, I’m not talking about coffee. I’m referring to breakfast. Here are some ideas for breakfast that don’t require a drive-thru window.

1. Have a piece of casserole. It takes time to cook eggs and bacon for breakfast. No one wants to ruin their clothes with the mess it can create. On Sunday night, get breakfast done early. Put together a casserole using your favorite ingredients. Fewer eggs are needed in a casserole than when frying or scrambling them for breakfast each morning. Depending on the size of your family, the casserole may last two to three mornings.

2. Yogurt. Yogurt is a healthy and economical breakfast choice. When you are eating on the run, grab a container of yogurt and some dried or fresh fruit. Cutting up fruit on top of the yogurt adds carbohydrates to fuel you for the morning in addition to the calcium and protein in the yogurt itself.

3. Breakfast shake. This is even quicker and can be ingested while driving without taking your eyes off the road or both hands off the wheel. Put together some frozen fruit favorites, ice cubes, frozen yogurt, and unsweetened juice in a blender. Pour into Styrofoam cups to keep it cold. Everyone can grab a cup on the way out the door. The nutritional effect is about the same as yogurt, but without the spoon.

4. Pigs in a blanket. This is the homemade version. Whip up a batch of pancakes and freeze them in short stacks of three. A package or two of frozen link sausage is needed to create this quick and economical meal idea. Thaw out a stack of pancakes. Heat up three sausages in the microwave. Wrap a pancake around each sausage. Voila! You’ve got an instant pig in a blanket. Eat it as you watch the last of your favorite morning show or as you walk to the bus stop. It can be eaten in the car without too much fuss or mess. For a sweeter taste and less mess, add a little maple syrup or honey to the batter when making the pancakes.

5. Breakfast sandwiches. In the evening, while you are getting things ready for the next day, grill up a few breakfast sandwiches. Choose whatever you like: turkey slices, ham slices, cheese, tomato, bacon, etc. When the sandwich cools, cut it into bite size pieces and put it in a container. In the morning, just grab a container; pop it into the microwave for fifteen or twenty seconds and breakfast is served.

These breakfast ideas are time saving and money-saving too. They make use of items you buy normally and also whatever you have around the house to create delicious fare for a morning rush. No more excuses for skipping breakfast or swinging into the fast food restaurant every morning.

Tips by: Basic Recipes


Thursday, May 8, 2008

Easy Cupcake Recipe


This simple yellow cupcake recipe creates a cupcake that is perfect background for your creative decorating ideas.

Ingredients

• 2 1/4 cups all purpose flour
• 1 1/3 cups sugar
• 3 teaspoons baking powder
• 1/2 teaspoon salt
• 1/2 cup shortening
• 1 cup milk
• 1 teaspoon vanilla
• 2 large eggs

Easy Cupcake Recipe Directions

Preheat oven to 350 degrees. Line cupcake pans with paper liners.

Combine flour, sugar, baking powder, and salt in a large mixing bowl. Add shortening, milk, and vanilla. Beat for 1 minute on medium speed. Scrape side of bowl with a spatula.

Add eggs to the mixture. Beat for 1 minute on medium speed. Scrape bowl again. Beat on high speed for 1 minute 30 seconds until well mixed.

Spoon cupcake batter into paper liners until 1/2 to 2/3 full.

Bake for 20 to 25 minutes or until toothpick inserted in center comes out clean.

Cool 5 minutes in pans then remove and place on wire racks to cool completely.

Once cupcakes are completely cooled, frost with your favorite frosting recipe or decorate as you desire.

Recipe by: CupcakeRecipes.com

The heavenly dessert Tiramisu


Say Tango Italiano with Tiramisu. Tiramisu in Italian means ‘pick-me-up’… giving a ‘lift’ from low spirits.

The author of Cupcakes Galore, Gail Wagman, says, "Tiramisu is an Italian cake usually made with sponge cake or ladyfingers soaked in a mixture of coffee and Marsala, filled with mascarpone cream and topped with grated chocolate." It is a cool, refreshing Italian dessert that once tasted, leaves an indelible impression on you. Add in just a slight bite on the tongue, and tantalizing hint of the liquor. Suddenly, you get a teeny explosion of chocolate on your tongue that disappears in a flash.

History of Tiramisu

Also known as "Tuscan Trifle," the dessert was initially created in Siena, in the northwestern Italian province of Tuscany. The occasion was a visit by Grand Duke Cosimo de'Medici III, in whose honor the concoction was dubbed zuppa del duca (the "duke's soup. The original recipe called for custard and only recently has Mascarpone cheese (triple-creme cheese) been substituted.

Three types of Tiramisu

· Basic Tiramisu
Tiramisu basically includes Mascarpone cheese, raw eggs, sugar, espresso coffee, ladyfingers, liquor and cocoa. Heavy cream is an optional ingredient. The richness and taste depend on the quantity of each ingredient and the care of preparation.

· Tiramisu varieties
Tiramisu of 21st century is experiencing innovative changeovers. Chefs all over the world are trying their best culinary skills to work out extraordinary Tiramisus. Be it experimenting with different kinds of wines or altering any ingredient to suit the taste better!

· Healthy Tiramisu
"Healthy Tiramisu" is the safe option for those ultimate, calorie-conscious dessert-lovers who would shun this heavenly dessert because of high fat content or the raw eggs.

Four expert tips

· Tiramisu is one of those dishes that benefits greatly from being allowed to rest so the flavors can really mingle together

· Save time by buying the basic sponge cakes. The coffee mix liquid moistens the cake right through

· Soak ladyfingers in warm, strong, sweetened coffee to avoid getting dry centers without oversoaking

· It can be prepared in advance and kept in the freezer. Remember to remove it from the freezer enough time in advance to serve it cold at refrigerated temperature, but not frozen.

Tiramisu is like Heaven in your mouth! So…just ‘pick-it-up’!

By Purabi Naha

Wednesday, May 7, 2008

Spicy Chicken Sandwich


This is a really simple sandwich that you might want to give it a try!


Ingredients:

  • Leftover, pre-cooked or canned chicken (shredded)
  • Low-fat mayonnaise
  • Chopped celery
  • Chopped pepper (green or red)
  • Curry powder
  • Tomato (sliced)
  • Fresh spinach leaves OR romaine lettuce
  • Whole-grain bread
  • Instructions:
    Mix leftover cooked (or canned) shredded chicken with low-fat mayonnaise.
    Add chopped celery, chopped pepper (green or red), and curry powder to taste.
    Serve on whole-grain bread with sliced tomato and spinach leaves or Romaine lettuce.

    Written by Carrie

    Tuesday, May 6, 2008

    Baked Cheesecake Recipe


    A smooth and creamy baked cheesecake recipe filled with rich cream cheese and baked to perfection. This recipe will get non-stop compliments and satisfied smiles. Cheesecake is one of life's great rewards, this one is no exception.


    Ingredients:

    Crust:

    2 1/4 c. graham cracker crumbs
    1/2 c. butter or margarine, melted

    Filling:

    1/2 c. sugar
    1 (8 oz.) pkg. cream cheese, softened
    1 tbsp. lemon juice
    1/2 tsp. vanilla
    Dash of salt
    1/4 c. milk
    2 eggs


    Topping:

    1 cup sour cream
    1/2 tsp. vanilla
    2 tbsp. sugar

    Directions:


    1. Combine graham cracker crumbs and butter, press into buttered 8 inch pie plate to form crust on bottom and sides.

    2. In a mixing bowl, beat cream cheese until fluffy. Gradually add in lemon juice, 1/2 cup sugar, salt and vanilla.

    3. Add eggs, 1 at a time, mixing well after each addition. Pour filling into crust.

    4. Bake at 325F for 25 to 30 minutes or until set.

    5. Combine the 2 tablespoons of sugar, sour cream, and 1/2 teaspoon of vanilla; spread over top of cheesecake then bake for 10 minutes longer. Chill for 5 hours or more before serving.

    Cheesecake Baking Tips

    There are a few things that you need to take note of when you bake cheesecake:


  • Always use softened cream cheese for complete blending with the other ingredients.

  • Never overbake a cheesecake. With larger cheesecakes overbaking will result in a crack in the center. A properly baked cheesecake will still have a small area (about 3") in the center, that's still very moist when its removed from the oven.

  • To prevent a cheesecake from cracking ... After removing a cheesecake from the oven, run a thin knife around the edge, between the pan and the crust, to free the cake from the sides of the pan.

  • Cool completely before removing the sides of a springform pan, then refrigerate the cheesecake for several hours before serving

  • Most cheesecakes taste better and cut easier if made a full day before serving.

  • To slice a cheese cake, use a knife with a long thin blade. Dip the knife in warm water and wipe the blade clean after cutting each slice.

  • To cut a whole cheesecake into perfect slices, use dental floss instead of a knife.

  • Store leftover cheesecake in plastic wrap or in a covered airtight container. If properly wrapped and refrigerated, a cheesecake will keep well for at least 3 to 4 days.

  • Cheesecakes can be frozen. Careful wrapping is very important. To freeze, place a fully cooled cheesecake in the freezer, uncovered, for 1 hour. If it's in a springform pan, remove the sides of the pan and freeze with the bottom of the pan in place. After 1 hour, use a knife to separate the cheesecake from the pan bottom. Slide it onto a foil-wrapped piece of heavy cardboard. Wrap in plastic wrap, then carefully place it inside a large freezer bag or wrap it in heavy duty aluminum foil.

  • For a fruit-topped cheesecake, freeze without the topping and add the topping before serving.
  • Always thaw a frozen cheesecake in the refrigerator. After it's partially thawed, transfer it from the cardboard bottom to a serving plate.

    Tips by: Sandy Moyer


  • Friday, May 2, 2008

    The Top Ten Things a New Bartender Should Know


    Bartending could be one of the greatest jobs around because it is so much fun and comes with an exciting environment. No matter if you are working in a restaurant, night club, or a small bar down the street, you can enjoy your job just the same. Being a new bartender, you will likely get several tips and strategies from many others and you'll learn new things every day! Obviously, learning from another bartender is the best way to go because they already have the "hands on" experience. However, before you step into your new job, you can be a step ahead of the game with the knowledge of ten simple guidelines.

    1. The Bartenders Station
      This is the area on top of the bar where you will keep all of your utensils you need for mixing drinks. These items may include your shaker, strainer, and jigger. Underneath there, usually you will have a sink and your speed rack.
    2. The Speed Rack
      Basically, your speed rack will be all of the well (less expensive) liquors. The order of the rack goes from left to right and has an easy saying to help remember. "Vikki Gets Really Trashed Tuesdays and Wednesdays." Each letter will stand for a liquor, Vodka, Gin, Rum, Tequila, Triple Sec, and Whiskey. Remember, never use the word "cheap" when you are describing well liquors.
    3. The Back Bar
      The back bar, usually shelves on the wall behind the bar, consists of your premium liquors. You will find that some drinks always call for a premium brand. Keep your back bar shiny and clean, it is your customers first impression of the bar.
    4. Equipment
      There are several items you will need to have at your bar at all times. You will need a shaker and cheater (the smaller version of the shaker), a cork screw (for opening wine bottles) and a jigger, which is used for measuring ounces of liquor. Many bartenders may not use a jigger, but it is a good idea for a new bartender. In addition to these items, you will also want to have a bar towel, bar spoon, strainer, and salt container, used to dip glasses in lime juice, salt and sugar.
    5. Mixes
      Orange juice, grapefruit juice, tomato juice, grenadine, cranberry juice, lime juice, pineapple juice, bloody mary, strawberry and pina colada mixes are all needed for different types of drinks. When using sour mix, which is actually sweetened lemon juice, make sure to dilute it first. Make it half water and half mix and it should do the job!
    6. Glasses
      Be sure to learn all of your glasses because in a professional environment, different drinks will call for different glasses. A few examples would be a shot glass, highball glass, margarita glass and an old-fashioned glass. There are quite a few glasses, so do your research and get familiar with them.
    7. Liquors versus Liqueurs
      Know the difference between the two. Liquors include Vodka, Scotch and whiskey, to name only a few. Liqueurs usually are sweeter and more colorful. These may include triple sec, sloe gin, kahlua and midori.
    8. Garnishes
      It is important to know what type of fruit to garnish your drinks with. Not all drinks call for a garnish, but many of them do. For instance, a martini will usually have an olive and a kamikaze will likely have a lime wedge. Study your drinks and know the garnishes for a much better presentation. The rule of thumb is, when a drink calls for lime juice, garnish it with a lime.
    9. Beer and Wine
      Alcohol contents vary with different beers and wines. Regular domestic beer, such as Coors or Budweiser usually contain between three and one half to four and one half percent alcohol. Light domestic beers, such as Miller Lite or Michelob Light may contain between two and one half to three and one half percent alcohol. Imported beers, such as Samuel Adams or Red Stripe contain four and one half percent and higher. Different wines can go anywhere from seven to fifteen percent alcohol. Draft beer has a shelf life of thirty days and it should always be kept at a cool temperature, otherwise is will foam badly. Be sure to always hold your glass at an angle when you are pouring draft beer to get the right amount of head at the top of the glass.
    10. A.L.E. Laws
      Being a bartender, it is vital that you know and understand the laws from the Alcohol Law Enforcement (A.L.E.). Making sure all of your customers have proper identification, knowing when a customer has had enough to drink, and understanding tax stamps on liquor bottles are only a few of several things you must know as a bartender. Study the A.L.E. laws very carefully.

    Bartending is mainly about memorization and understanding laws. It is very easy to get the hang of it once you start. Spend a little extra time studying your drinks. All bars will be different in one way or another. Some bars may set up differently, only serve certain liquors, have daily drink specials and in house rules for you to follow. It is important for you to get familiar with your bar's do's and don'ts.

    The one thing you really want to always keep in mind is that your charm and personality play a big role with your income at this job. Leave your problems at home and come in to work to have fun! Many people come in to a bar as a distraction from their problems and often turn to the bartender to talk, so have a positive attitude when you're working! Enjoy your new adventure in one of the greatest jobs known.

    Article by: ChefVault


    Pizza: A Personal Odyssey

    I've been thinking about pizza all morning. This is unusual, not because I don't normally think about food --I often plan whole four course meals in my head and scribble out grocery lists as a way to pass the time -- but because I've only recently developed a fondness for pizza. As a child I was the only kid in the classroom who regularly listed pot roast or barbecued pork chops rather than the cheese laden Italian pie as her favorite good. I found that pizza was too sloppy to eat without accident, too prone to burn the roof of my mouth, and left me thirsty for hours after I ate a slice. I didn't hate it, and would happily eat it when it was given to me as a reward for reading books or winning a school-wide contest, but it was not the kind of meal I dreamed about in drooling anticipation. It was like hamburger gravy - something that was served to me when mom couldn't come up with anything better.

    My view of pizza as a convenience food of mediocre flavor continued throughout my teen years. At the high school snack bar, I was more apt to order a cookie and a container of milk than a slice of pepperoni. And when students in my dorm at college called for delivery I could usually be talked into chipping in, but it wasn't ever my first choice. (That would have been a trip to Friendly's for Vienna Mocha Chocolate Chunk sundaes with chocolate syrup in place of the hot fudge, chocolate sprinkles and NO cherry. Cherries pollute the whipped cream and are evil.) What has changed my mind now is fairly simple: I've actually had good pizza.

    The pizzas of my formative years were all of a piece: The crusts, both thin or thick, were almost always undercooked so that the slice bent in half dropping toppings onto my lap the moment I picked it up. These bendable pies were covered with nothing beyond salty mozzarella cheese, canned vegetables, and greasy pepperoni. They were from chain pizza joints or local pizza and sub shops that used the same basic recipes as the chain restaurants. The most exotic topping available at most places was pineapple, and no one would ever let me order it. Pizza was, put simply, bland and boring.

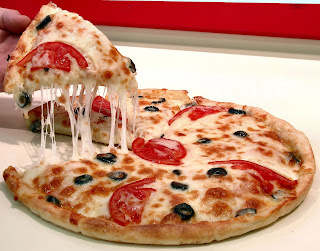
    Then revelation struck. I was at a local theatre group's cast party last year and the pizza available was not from one of our small town's chain restaurants, but from the Italian restaurant run by a little German woman named Inga. (Yes, an Italian restaurant with a German cook. It's the Midwest. I can't explain it beyond that.) Since there was nothing else available to eat and I was hungry, I took a piece of the simplest looking pie which had had brought for the vegetarians. It was topped with nothing more than sauce, cheese, tomatoes, basil and roast garlic. But the tomatoes and basil were fresh, the cheese and sauce judiciously applied, and the garlic toasted to a golden glowing brown. The crust was thin, and just crisp enough to make a structurally sound piece of finger food without being cracker-like and over-cooked. The first piece was a pure gluttonous joy which didn't significantly diminish for the second and third slices.

    I had been assumed into food heaven and choirs of angels were singing on my tongue.

    I've never again had a pizza quite like it. Even ordering the very same thing from the very same restaurant has failed to duplicate the experience. But those three perfect slices changed my perception of pizza forever, and since then I've been keen to try any and every kind until I find another awe inspiring pie. What my search has taught me is this: Small towns in the Midwest - my well-loved home stomping ground - have the worst pizza in the country. They may even have the worst pizza in the world.

    Most Midwestern small towns' pizza joints' toppings never go beyond the usual meats, canned mushrooms, green peppers, onions, and sliced ripe olives. The doughy, bendable crust I remember from my childhood is still the norm. I had to go to Chicago to discover wood fire pizza with pancetta and artichokes, and to New York for a six mushroom pizza with truffle oil and crust so thin and crisp it practically melted on my tongue. London contributed a simple cheese and tomato pie so perfect in its simplicity that it actually offered a viable alternative Indian food for a week. And in Boston, I was once served a strange, but wonderful, pie topped with goat cheese, mixed greens, and drizzled with a fruity balsamic vinaigrette. Then there are all the places that have delighted me by offering feta or blue cheese, jalapeƱo peppers, kalamata olives, zucchini, baby spinach, artichoke hearts, thinly sliced eggplant, roasted tomatoes, caramelized onions, roasted garlic, and fresh herbs as topping choices. Not to mention the white pizzas with clam sauce or all the pies which substitute more pungent cheeses for the traditional mozzarella.

    Right now, my favorite topping pair is very simple: jalapeno peppers with pineapple. It's truly the perfect marriage of spice with sweet. If only I could find a place with a decent crust and sauce from which to purchase it.

    I fail to understand why the Midwest has fallen so far beyond the national 8-ball when it comes to gourmet pizza. We were cursed with thong baring low-riders, tongue piercing, and Red Bull right along with the rest of the country, so isolation driven parochialism simply isn't a convincing argument. And you can't tell me that Midwesterners don't eat out as much as people in other parts of the country, not when every local steak house is filled to capacity every Friday, Saturday and Wednesday night. Stubbornness might play a role. Midwesterners want to eat what they've always eaten; we cling to our comfort food with an unmatched ferocity. (This may explain why molded jello salads and Miracle Whip dressing remain so prevalent here while they faded into ignominy in the rest of the country long ago.)

    But asking Midwesterners to eat fancy pizza isn't at all the same as asking them to eat sushi or tapas or any of the other food trends that have blossomed elsewhere. Pizza is something they're already familiar with; it's not a 'weird' food or a 'foreign' food, so there shouldn't be any of the initial resistance they'd have to something entirely new.

    I can only conclude that the major problem is that Midwesterners lack imagination. It's the only possible explanation for why pizza here is stuck in the same rut. It's depressing. Especially since I could really go for one of those six mushroom with truffle oil pies right now. Damn. How long until lunch?

    -Kathleen Notestine